
When a chiropractor goes to an event, they'll always meet someone with a bad back and a long story to tell. That's what happened to me last weekend.
This person wanted a free consultation on the spot to find out solutions to his back problem that he can do himself - for free.
So here it is: The FREE, EASY, Do-It-Yourself QUICK FIX for back pain, disc herniations and pinched nerves.
Back Pain is "Normal" and inevitable?
It’s estimated that 80% of people will experience low back pain at some point in their lives. A high percentage of these people will have #lowbackpain and leg pain caused by a herniated disc. (Also known as a disc bulge, disc protrusion or ‘#slippeddisc’.) That's how common back pain is, however common doesn't equal normal.
People who sit for a greater part of their working day may be predisposed to #backpain and #sciatica. Sports that involve running, jumping, contact or twisting have an increased risk of back injuries. Lifting improperly is also a common cause of spinal and disc injuries, that result in nerve compression.
What's 'Sciatica' ? It's pain that starts from the back or buttock and travels down the leg. The sciatic nerve is the largest nerve in the body. It starts from the spine in the lower back and travels all the way down the buttock, leg to the foot. Often the term “pinched nerve” is in reference to the pain that can be experienced down the leg when the nerves in the back, or the sciatic nerve is compressed.
Back Pain Relief

Dr Gary Tho, Chiropractic Doctor, Author and Speaker correcting a pelvic subluxation.
The best way to experience relief is to find out exactly where is the root cause of the pain. Is it a joint sprain, poor mechanics or a pinched nerve? This requires a visit to your back and spine specialist, chiropractor to get a thorough examination.
Of course, you can (and need) to help yourself too! Here’s seven of the best exercises to fix your bad back. If both the root cause is addressed, and you ease the muscles with these exercises, your spinal column will be well supported and stabilised. Best of all, you can say good riddance to your back aches and sciatic pains!
Here are the 7 best exercises to relieve back pain, disc herniations and sciatica.
1. Knee to Chest Stretch.
This exercise begins with you laying flat on your back on a mat, knees bent, and arms laying by your side. To begin, raise one of your knees as close to your chest as you can. You may use both of your hands to support your knee. Keep breathing, and hold your stretch for 20 to 30 seconds. Repeat with your other leg, and then repeat the entire set three times.
**A variation of this is bringing you knee to opposite shoulder and holding that stretch.
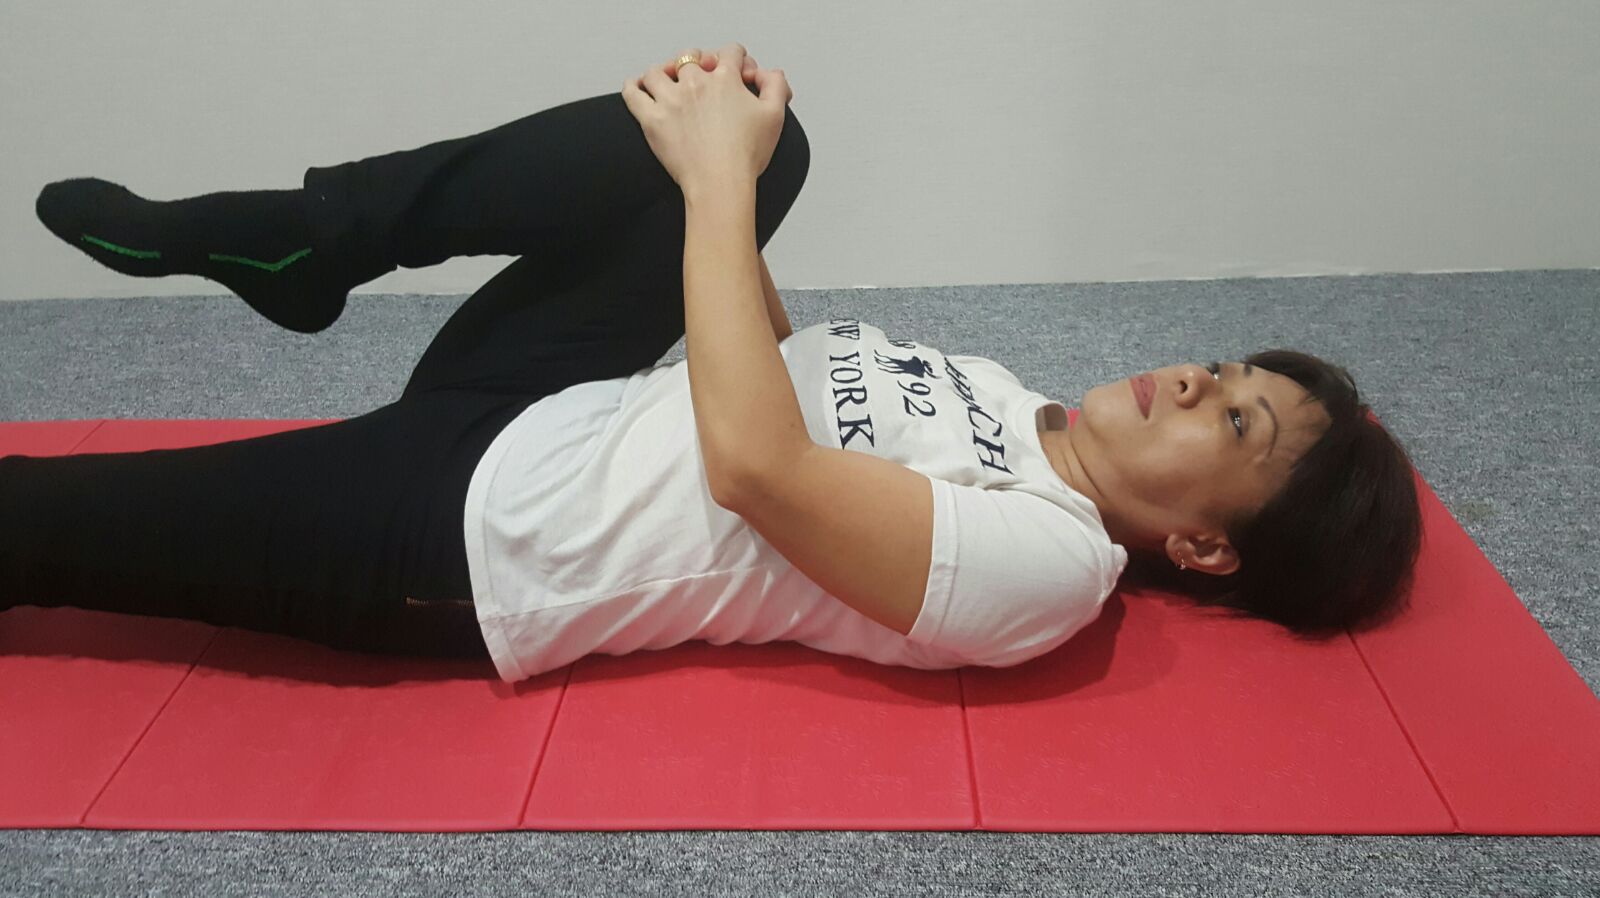
Back and Buttock (Glute) Stretch
2. Back Extension.
Lie face down on the mat, with your elbows below your shoulders, and hands forward in line with your torso. Next, press down onto the mat with both hands and forearms as you raise your head, shoulders and chest off the ground. Feel a gentle stretch on the stomach muscles as you lengthen your spine (by pulling your head away from your pelvis). Remember to keep both palms and both legs pressed firmly onto the floor. Hold your position for 8 to 10 seconds, then release and go back down to starting position. Repeat this set for ten times.
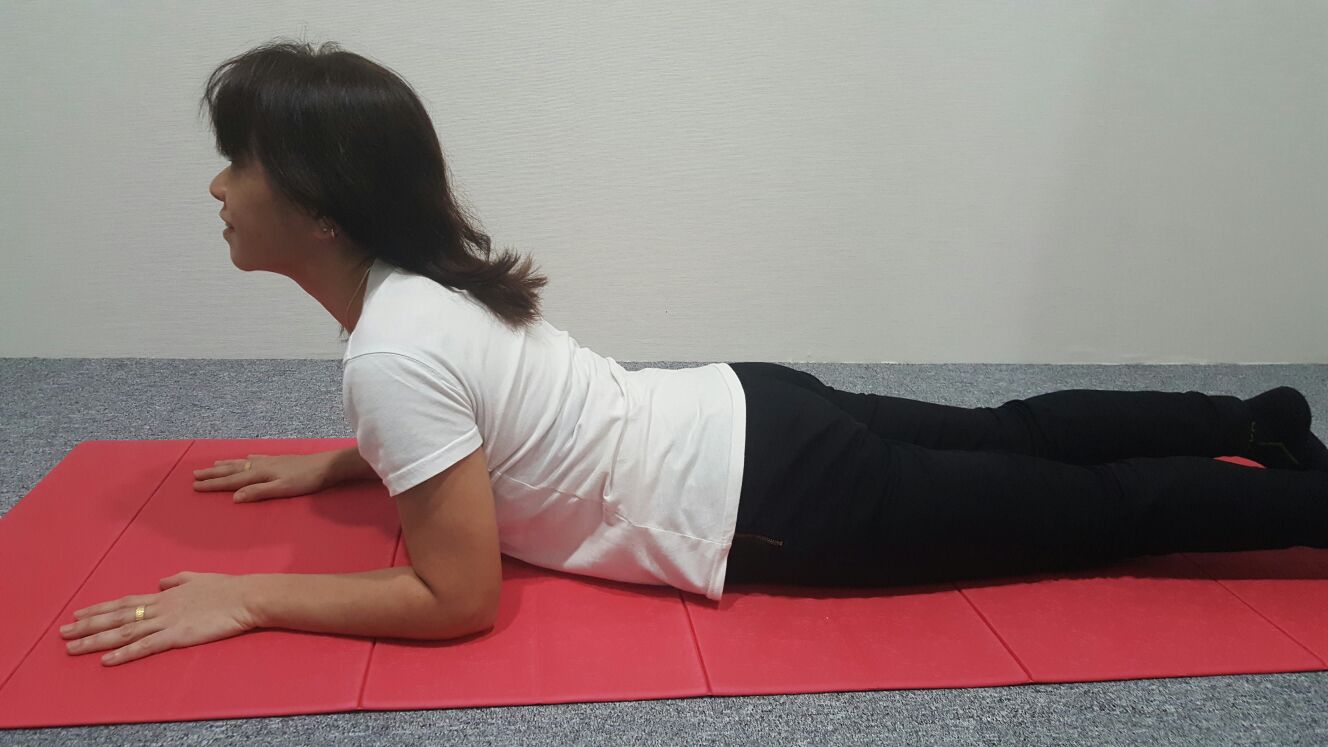
Back extension, lengthening the spine.
3. Hamstring Stretch.
Sit on your mat with your one leg extended in front of you and the other leg bent with your foot against the inner thigh of the straight leg. Sit tall, then lean forward from your hips as far as you can, until you feel a stretch in your hamstring. Hold for 20 to 30 seconds, then repeat for the other leg.

Hamstring stretch
4. Pelvic Tilt.
Lie on your back on your mat with your knees bent.
Step 1: Anterior tilt- Lift up your abdomen as high as you can (arching your lower back), while still keep your buttocks and your shoulders pressed to the mat. Hold for five to ten seconds, then relax.
Step 2: Posterior tilt- Flatten your back against the floor by tightening your abdominal muscles and bending your pelvic bone up slightly. Hold for five to ten seconds, then relax. Do a set of 10 repetitions.

Anterior Pelvic tilt

Posterior Pelvic tilt
5. Piriformis Stretch
Lie on your back with your knees bent, and both feet flat on the floor. Place the right ankle on top of the left knee creating a figure-4. Gently pull the left thigh toward your chest. You can grasp the back of the left thigh, or the front of the shin. Hold stretch for 20 to 30 seconds and repeat on the other side.
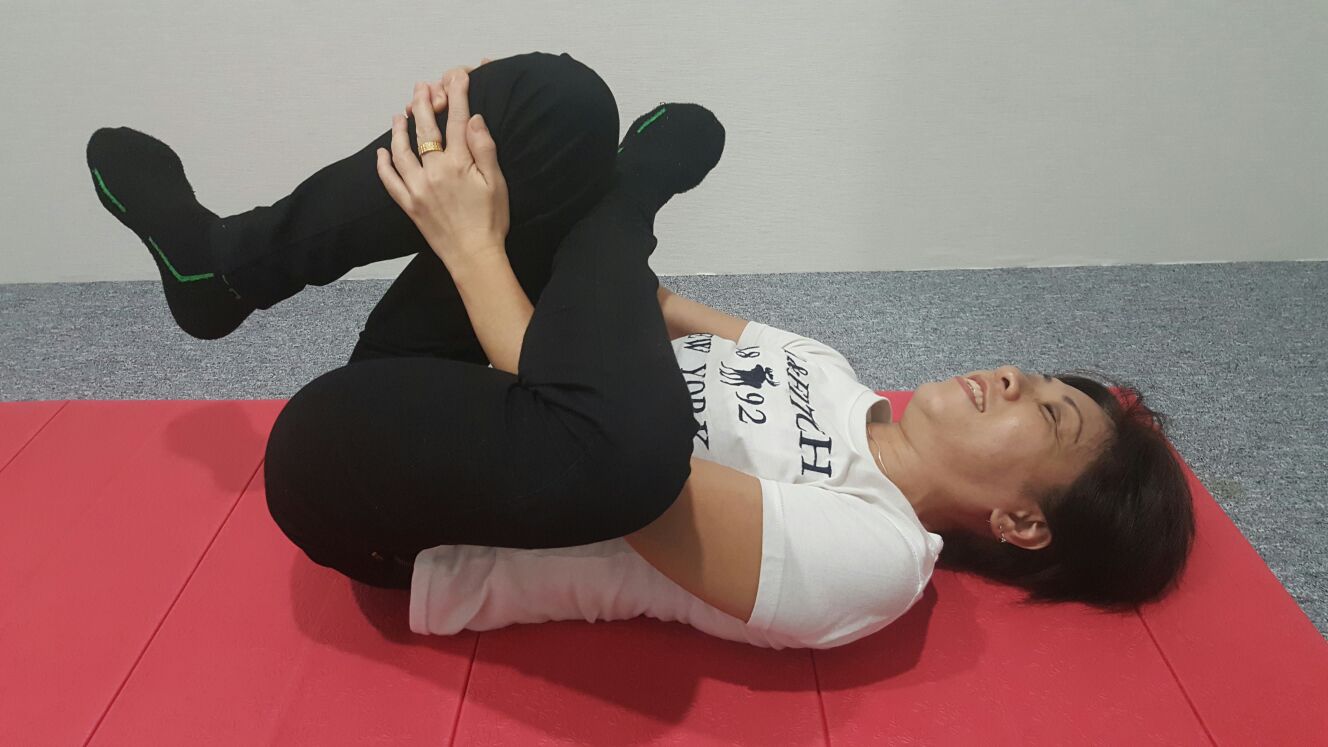
Piriformis Stretch
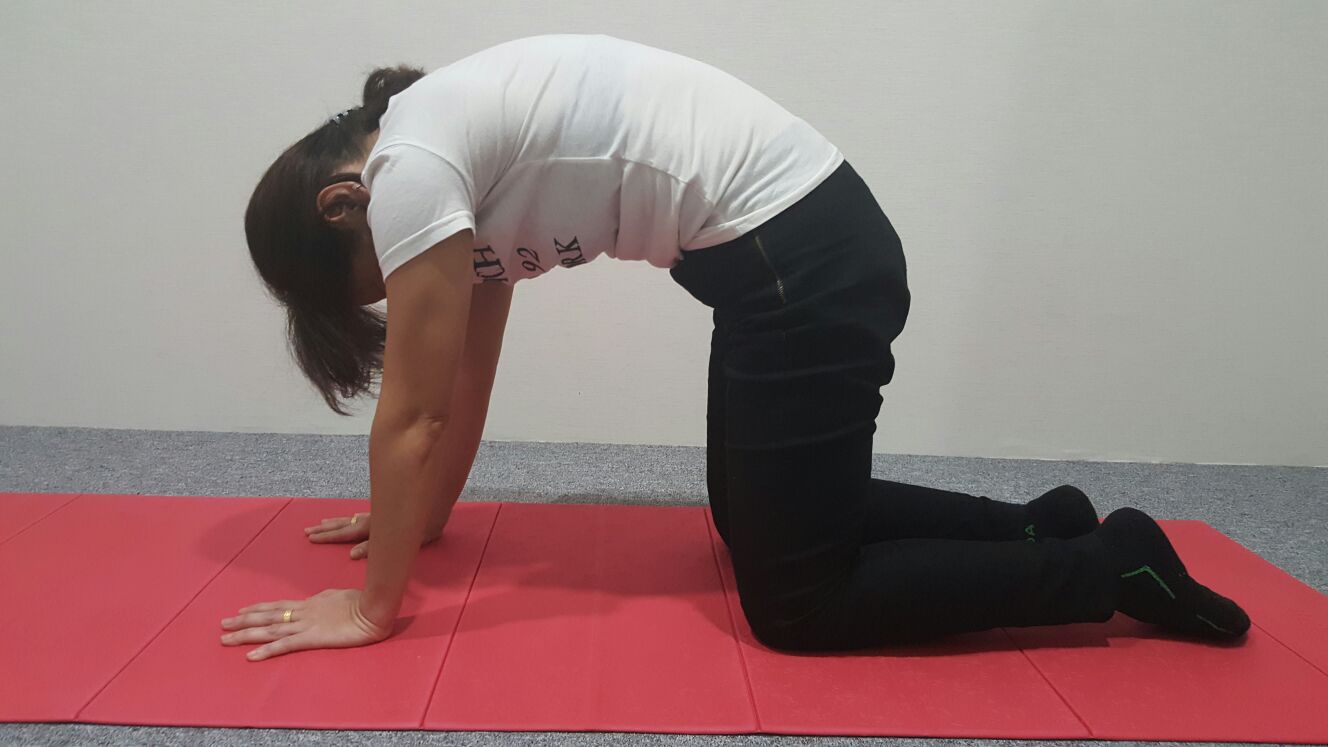
6. Child’s Pose (Prayer stretch)
Kneel on the floor with knees about as wide as your hips and sit on your heels. Flex forward at the hips, bringing your heart and chest between or on top of your thighs. Keep your arms extended forward, remembering to keep your buttocks in contact with your heels. Allow your forehead to rest on the floor. Hold for 20 to 30 seconds and repeat.

Child's Pose (Prayer Stretch)
7. Cat and Cow Pose
Start on your hands and knees keeping your wrists directly below your shoulders, and your knees directly under your hips.
Step 1: Cow Pose: Inhale and tilt your pelvis so you back arches and your tail sticks up. Let your belly drop down, but keep your abdominal muscles engaged by drawing your navel in. Lift your chin and chest by gently gazing toward the ceiling without cranking your neck.
Step 2: Cat Pose: As you exhale, tip your pelvis forward, tucking your tailbone between your legs. Your spine will round naturally as you drop your head and draw your belly to your spine. The pose should look like a cat stretching its back.
Inhale, coming back into Cow Pose, and then exhale as you return to Cat Pose. Repeat 10-20 times.

Step 1 Cow Pose (on inhale)
Step 2 Cat Pose (on exhale)
Remember to do these 7 back exercises at least twice per day while your back is in healing phase. Also remember to keep breathing throughout your exercise routine as you should never be holding your breath. Even if you experience a full recovery from upper and lower back pain, you should continue with a regular back pain exercises to keep your muscles strong and limber, and to prevent further troubles with sciatica.
Dr Gary Tho is a pain relief and peak performance specialist. He helps his clients solve sports injuries, aches and pains using his simple 4 step method. He believes we should all be able to live and move freely and without limitations and we should never settle for anything less than that.
Disclaimer: This article does not replace a professional consultation and examination with a qualified health care professional. If your back pain, disc injury or sciatica (pain travelling down the leg) does not improve with exercises, you will need to undergo a thorough examination to find and address the underlying cause of pain. You can book your initial consultation here.